Configure Telnet and SSH on Cisco Packet Tracer
- 1 minTo enable telnet or SSH on Cisco router, simply do it with “line vty” command. lets Configure:
-
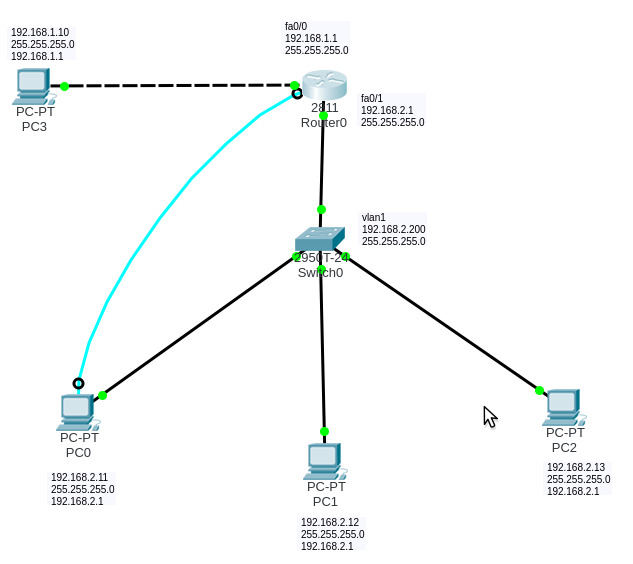
First create topology Network. and set a static IP for PC client, router and switch. See the picture below.
-
Go to Router0 console and configure Hostname, Secret password and telnet with “line vty” command.
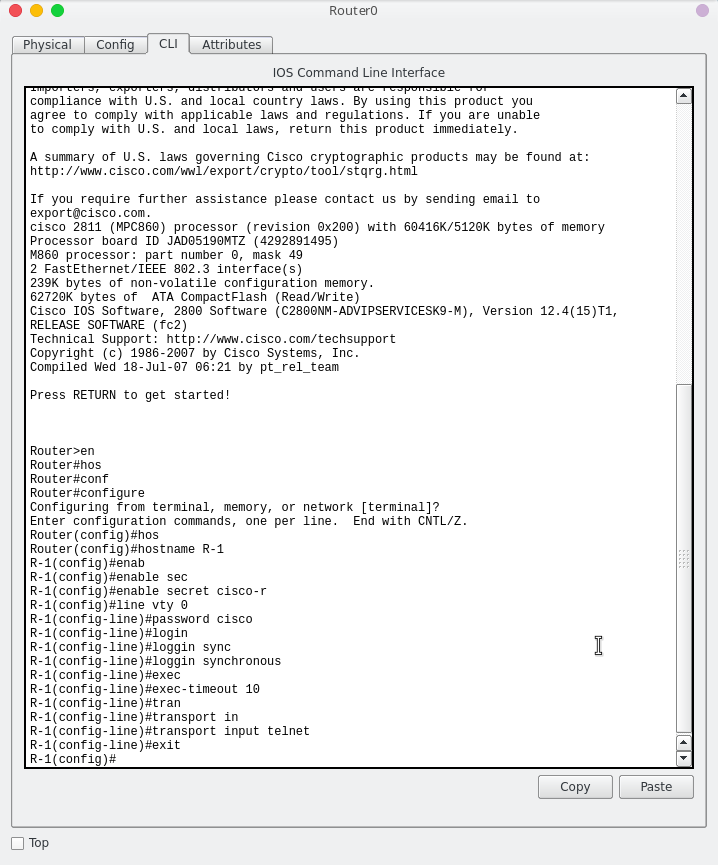
- “Enable secret ‘your password’” command for your router password user privileges.
- The “line vty” command enable the telnet and the “0″ is just let a single line or session to the router. If you need more session simultaneously, you must type “line vty 0 10“, its mean 11 client can access telnet.
- The “logging synchronous” command stops any message output from splitting your typing.
-
The “exec-timeout” command just sets the time-out limit on the line from the default to “10″ minutes.
-
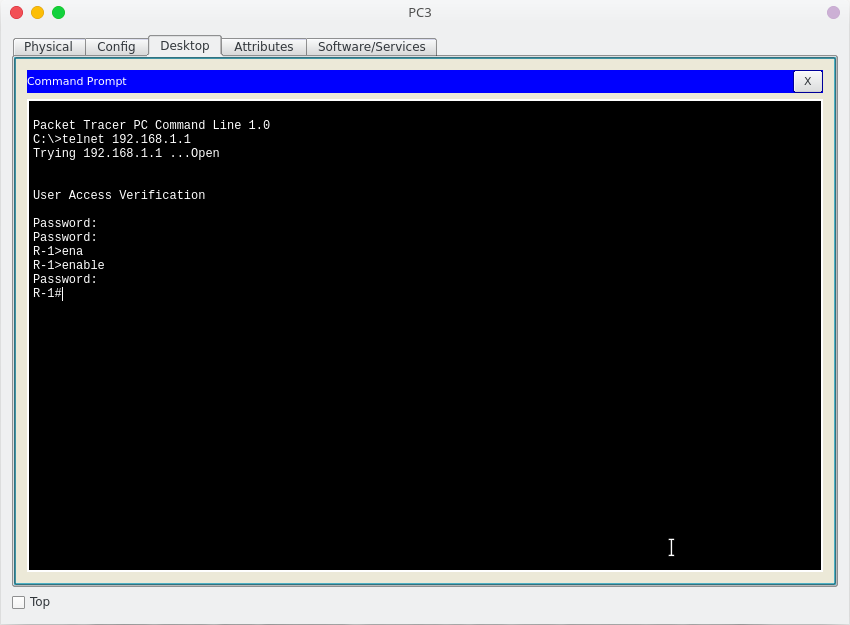
Testing Telnet Connectivity.
Let’s test telnet from the admin or client PC. Type telnet 192.168.1.1 and press enter, then enter the telnet username & password. Next type enable command and press enter, then type the router password.
-
Now you are remotely connected to router R1 and you can execute all router commands through telnet command line interface.
-
SSH Configuration.
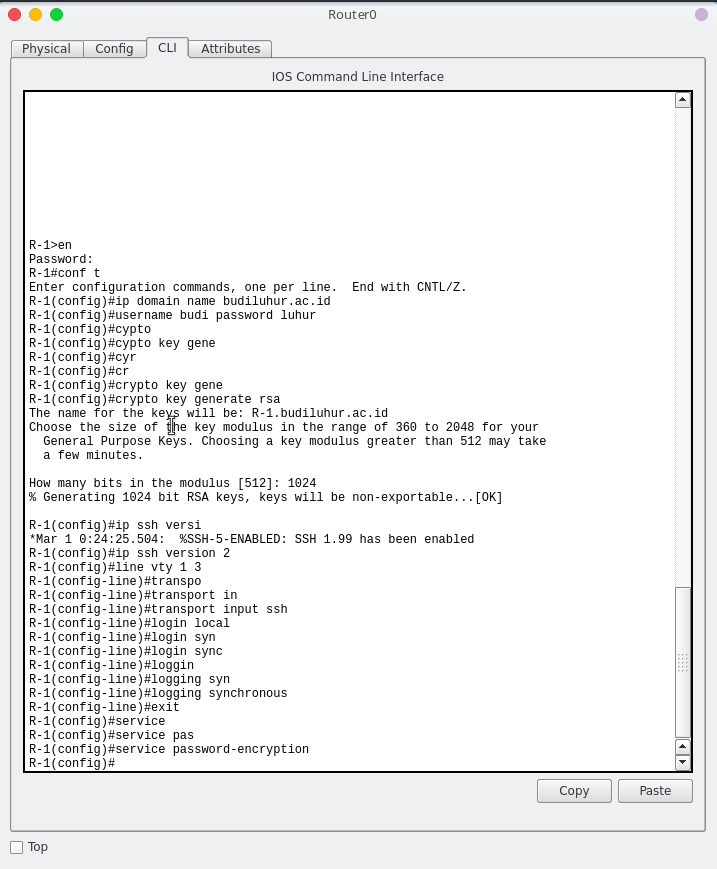
- “line vte 1 3” <~ this command will set only line 1 to 3 Virtual Teminal Lines can access SSH.
- “username budi password luhur” <~ this your username and password for SSH access.
- “crypto key generate rsa” command, when ask you “How many bits in the modulus [512]:” just type “1024″ and press enter. The system will generate 1024 bits keys to secure session lines. You can choose modulus in the range of 360 to 2048.
-
service password-encryption <~ encrypt your SSH password.
-
Testing SSH Connectivity
From a client PC, open the command line and type “ssh -l budi 192.168.1.1” then press enter.
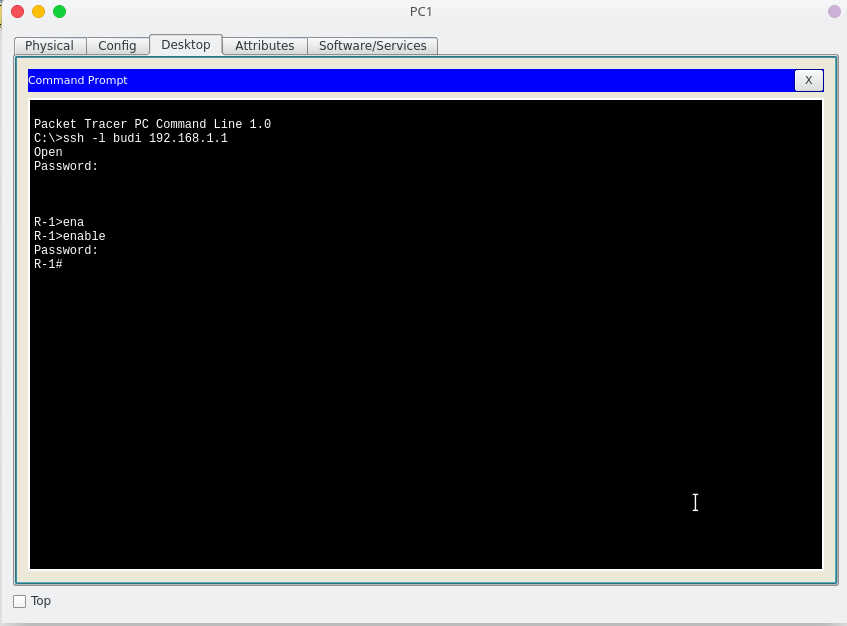
Now we have connected successfully and the connection is secured with Secure Shell.

Nurul Fajar
Mahasiswa banyak acara